
Arduino Radar Sensor
Arduino Radar Sensor
Melihat radar yang sering digunakan pada di bandara dan militer. Cara menerapkan gelombang radio menemukan objek, dan mengetahui jarak yang tepat, selalu menjadi misteri bagaimana cara bekerja alat tersebut, miniradar ini dapat dibuat dengan keterampilan elektronik standar.
Mini RADAR dapat dirakit untuk :
1. Untuk membantu orang-orang tunanetra mengamati lingkungan mereka
2. Untuk Eksplorasi Bawah Air
3.Untuk Pembersihan Plastik Bawah Air
Perancangan membuat mini Arduino Radar, memerlukan bahan-bahan berikut:
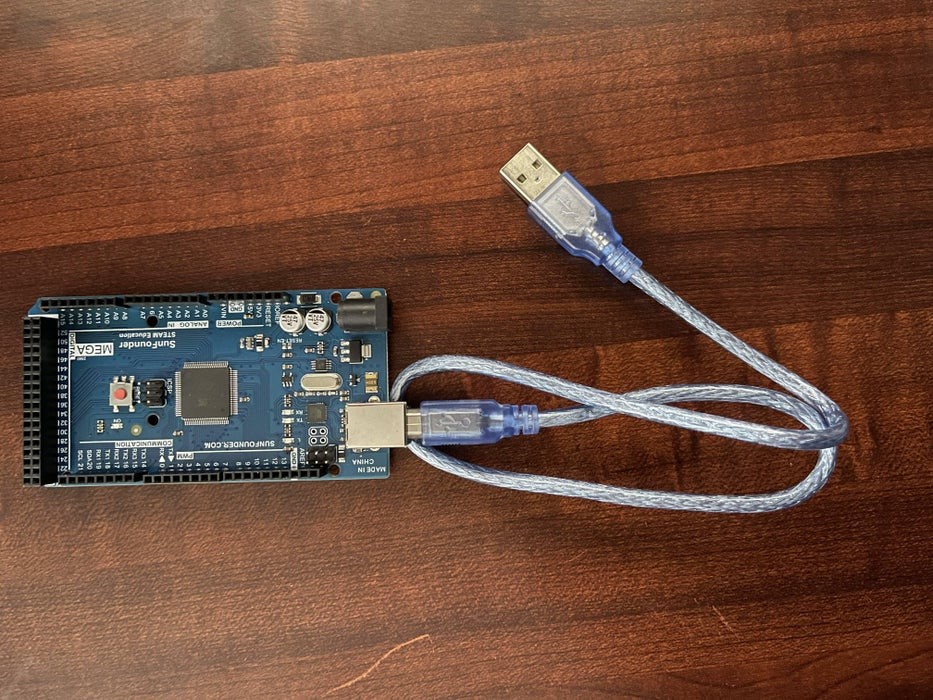
1. Arduino Mini atau Uno x1
2. Micro Servo x1
3. Sensor Ultrasonic HC-SR04 x1
4. Kabel USB A to USB B x1
5. Kabel Jumper Female To Male x4
6. Kabel Jumper Male to Male x3
7. Software Arduino IDE
Bahan tambahan:
1. Double Sided foam tape
2. Arduino Prototype Shield
3. Electrical Tape
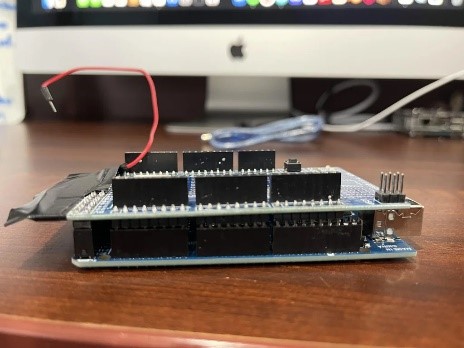
A. Prototype Shield
Ketika menggunakan shield untuk arduino akan mempermudah pemasangan dan perancangan, selain itu ketika dibutuhkan penggunaan solder maka tidak perlu menggunakan solder langsung pada arduino, dalam project ini jumper akan di solder ke shield arduino untuk sambungan motor servo.

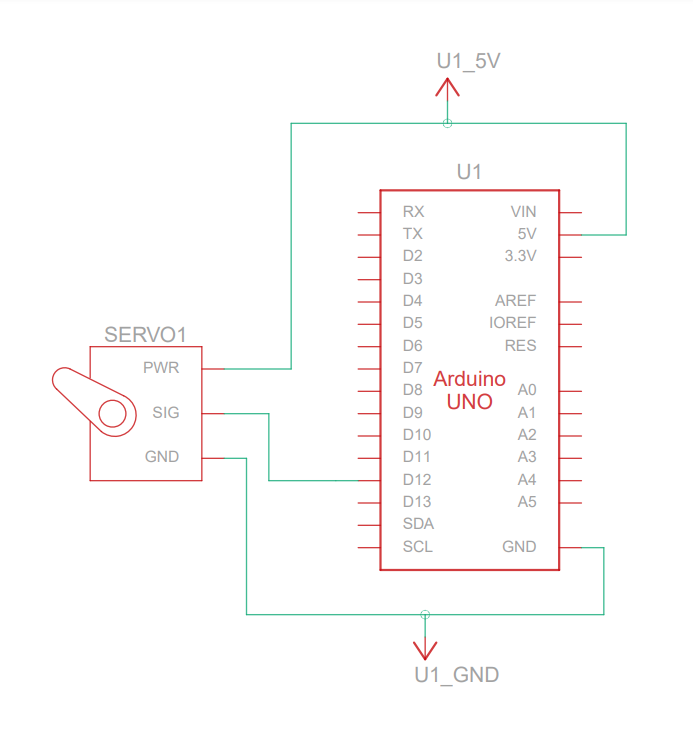
B. Servo ke Arduino
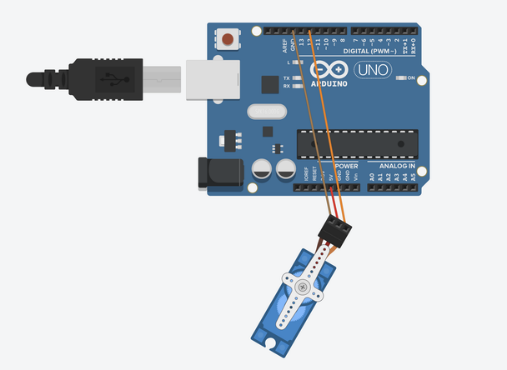
Tahap pertama menyambungkan motor servo ke arduino. Pada model ini motor servo digunakan untuk mengarahkan sensor ultrasonic yang akan dipasan pada servo. Servo yang digunakan dapat berotasi 180 derajat untuk melihat angel pada radar. Sebelum menghubungkan servo dengan arduino pastikan menggunakan tiga jumper male to male pada servo.
1. Hubungkan ground servo pin ke ground arduino
2. Hubungkan VCC servo ke 5 volt arduino
3. Hubungkan Signal servo ke pin 12 pada arduino.
Skematik dari Servo dan Arduino:
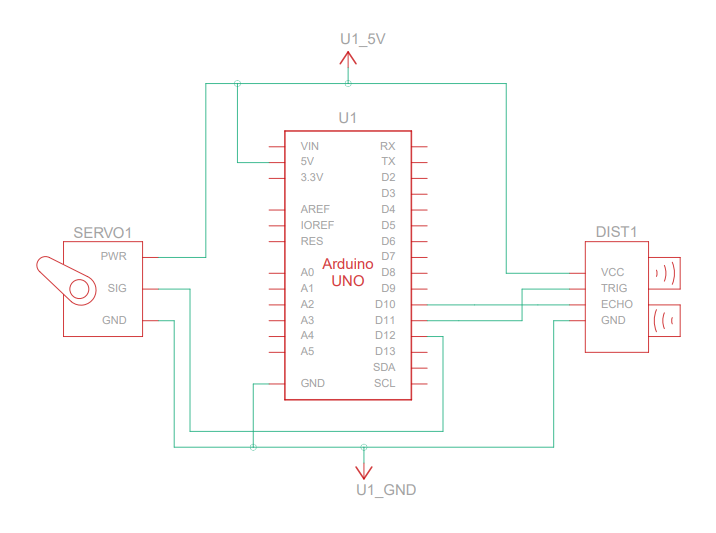
C. Sensor Ultrasonik ke Arduino

Selanjutnya dalam membuat mini arduino radar system untuk menghubungkan modul sensor ultrasonik ke arduino. Dalam model ini modul sensor ultrasonik akan menjadi radar pada produk radar ini. Alat ini akan merasakan objek disekitarnya. Sebelum mencoba modul sensor ultrasonik pastikan untuk menghubungkan empat kabel jumper male to female pada pin modul sensor ultrasonik ke arduino.
1. Hubungkan kabel ground dengan ground dengan Arduino.
2. Hubungkan kabel VCC ke 5V pin Arduino. (Jika tidak ada pin 5V tersisa pada arduino maka gunakan lah porjectboard agar memperbanyak pin 5V).
3. Hubungkan kabel Echo ke Pin 11 Arduino.
4. Hubungkan kabel Trigger ke Pin 10 Arduino.
Skematik dari Ultrasonik dan Arduino:
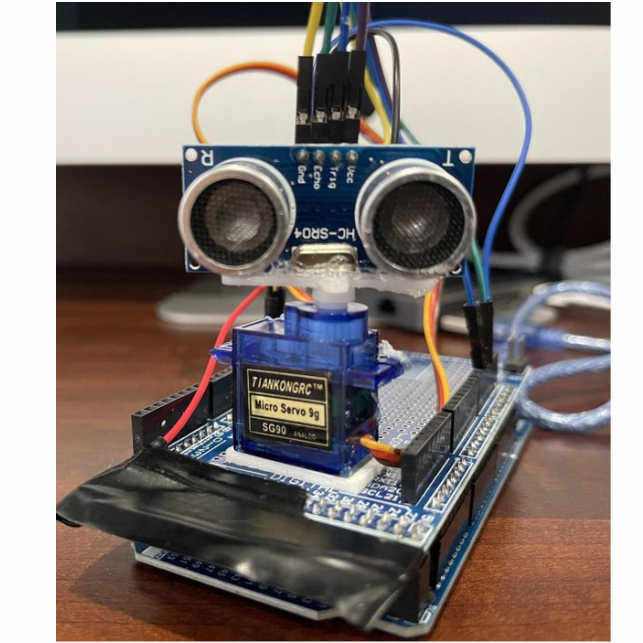
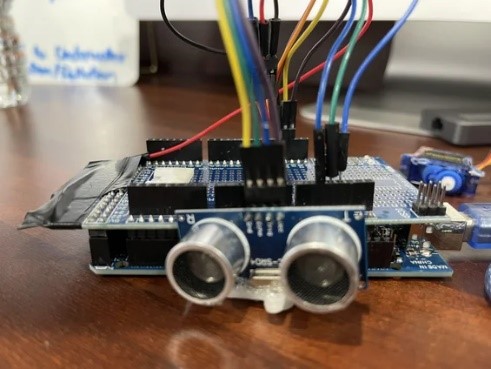
D. Ultrasonik dan Servo
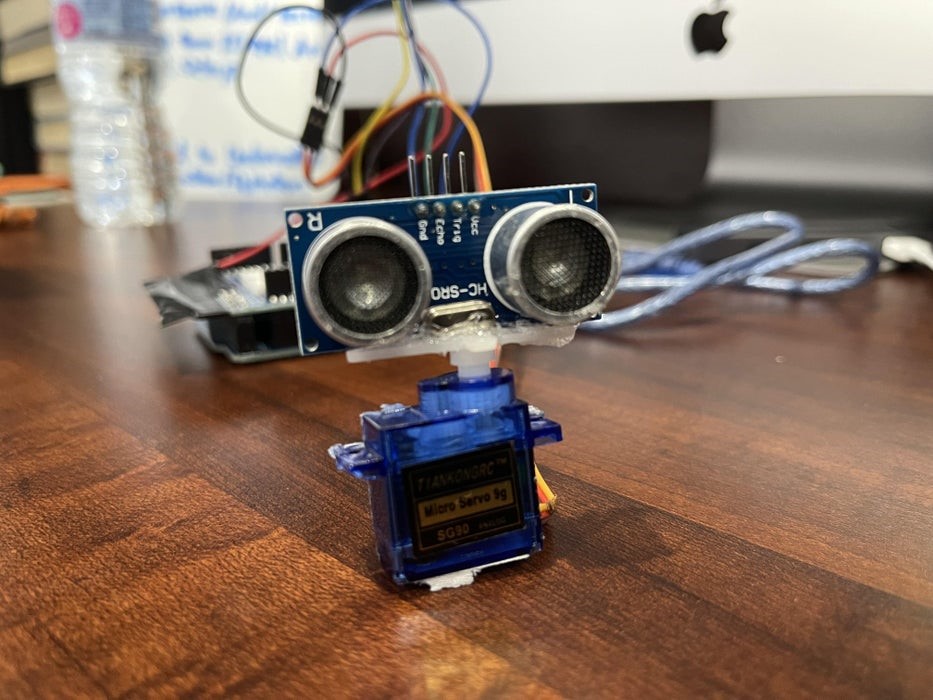
Selanjutnya membuat system mini radar arduino tempelkan dengan lem modul sensor ultrasonik ke motor servo. Modul sensor ultrasonik dapat berputar 180 drajat.
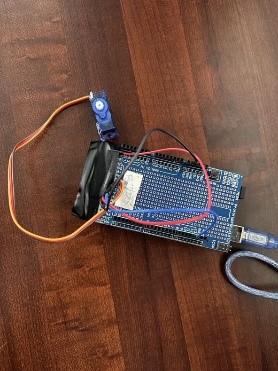
E. Menggabungkan semua bagian
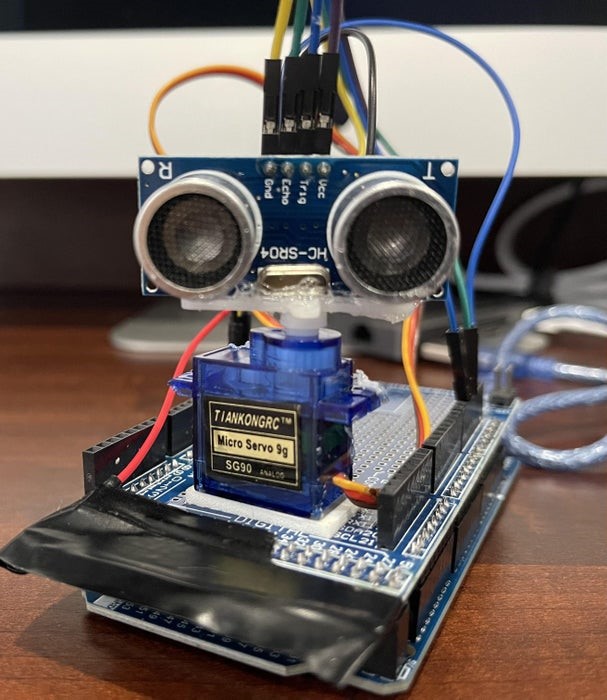
Pada gambar-gambar yang terlihat gunakan double tape untuk menempelkan setiap bagian komponen dan modul.
F. Memperogram modul dengan Arduino IDE
Selanjutnya menambahkan program pada mini arduino radar system menggunakan software arduino IDE.
Kode Program
// Includes the Servo library#include <Servo.h>. // Defines Tirg and Echo pins of the Ultrasonic Sensorconst int trigPin = 10;const int echoPin = 11;// Variables for the duration and the distancelong duration;int distance;Servo myServo; // Creates a servo object for controlling the servo motorvoid setup() { pinMode(trigPin, OUTPUT); // Sets the trigPin as an Output pinMode(echoPin, INPUT);// Sets the echoPin as an Input Serial.begin(9600); myServo.attach(12); // Defines on which pin is the servo motor attached}void loop() { // rotates the servo motor from 15 to 165 degrees for(int i=15;i<=165;i++){myServo.write(i); delay(30); distance = calculateDistance(); // Calls a function for calculating the distance measured by the Ultrasonic sensor for each degree Serial.print(i); // Sends the current degree into the Serial Port Serial.print(","); // Sends addition character right next to the previous value needed later in the Processing IDE for indexing Serial.print(distance); // Sends the distance value into the Serial Port Serial.print("."); // Sends addition character right next to the previous value needed later in the Processing IDE for indexing } // Repeats the previous lines from 165 to 15 degrees for(int i=165;i>15;i--) { myServo.write(i); delay(30); distance = calculateDistance(); Serial.print(i); Serial.print(","); Serial.print(distance); Serial.print("."); }}// Function for calculating the distance measured by the Ultrasonicsensorint calculateDistance(){digitalWrite(trigPin, LOW); delayMicroseconds(2); //Sets the trigPin on HIGH state for 10 micro seconds digitalWrite(trigPin, HIGH); delayMicroseconds(10); digitalWrite(trigPin, LOW); duration = pulseIn(echoPin, HIGH);//Reads the echoPin, returns the sound wave travel time in microseconds distance= duration*0.034/2; return distance;} |
G. Mambahkan program ke proses 4
Selanjutnya untuk menjalankan program pastikan mengubah COM pin pada arduino IDE yang telah menyala.
Periksa pada Tools à Port pada arduino IDE
Kode program:
|
|
source: https://www.instructables.com/Arduino-RADAR-Sensor/
H. Menajalankan program
About us